

Apple’s steps, in order
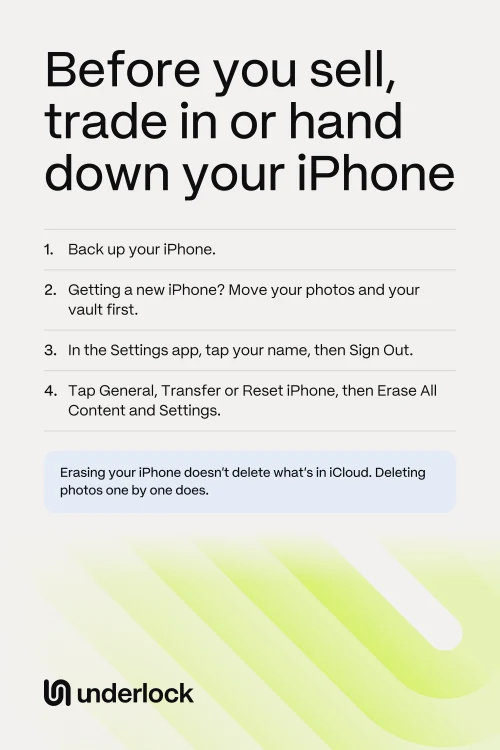
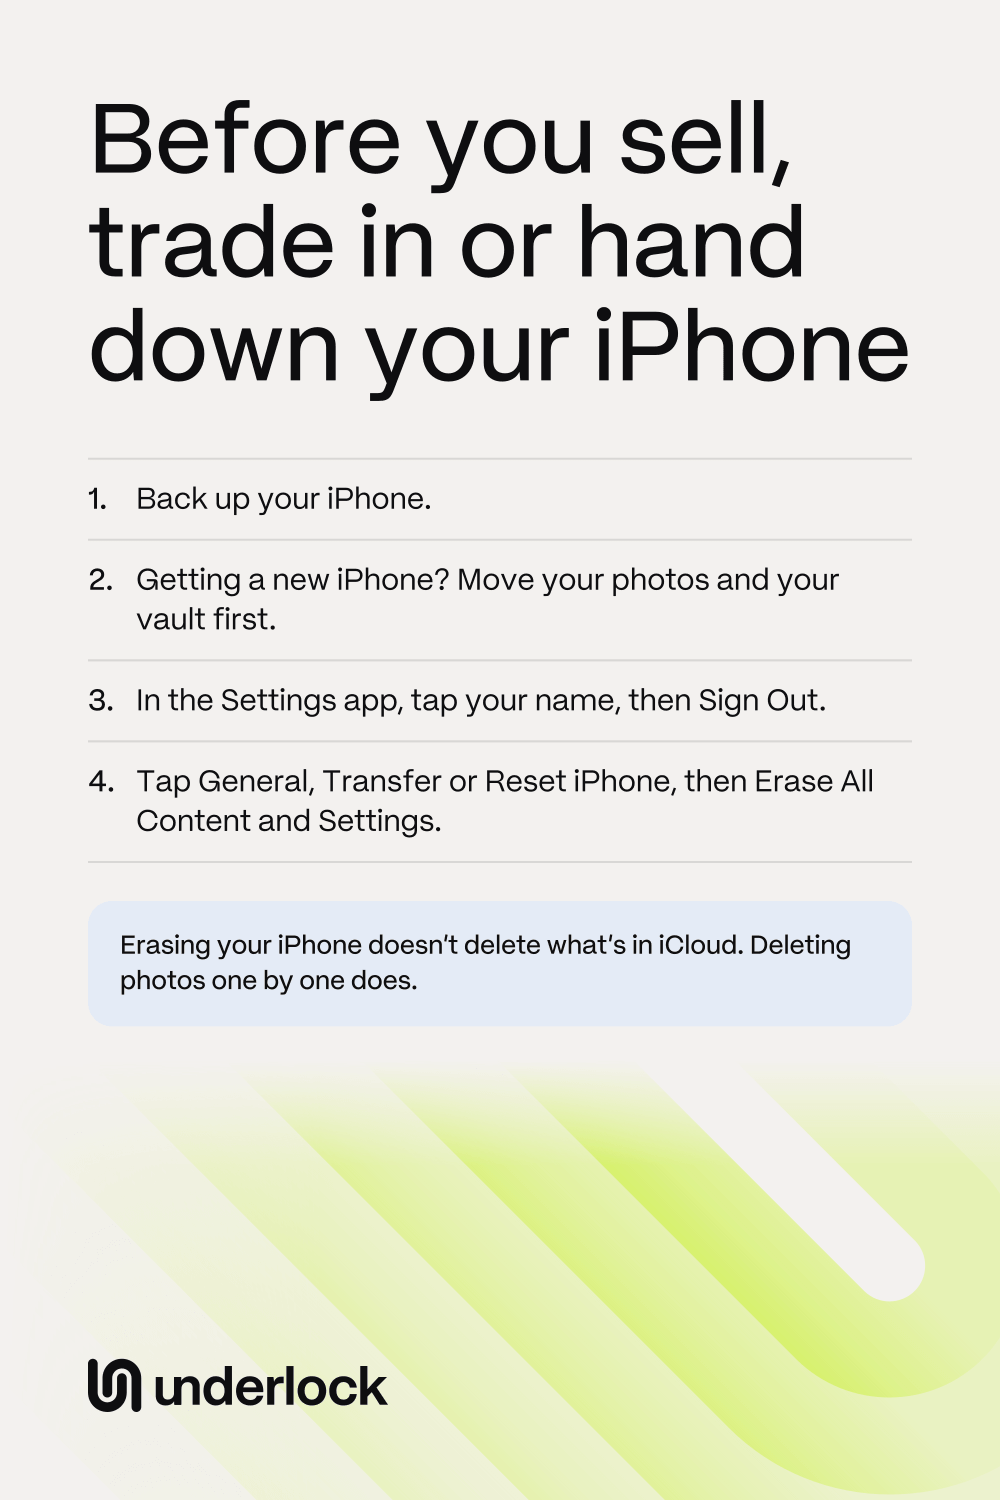
These are the steps Apple gives for selling, trading in or giving away an iPhone. Keep to this order, because the erase can’t be undone.
- Back up your iPhone. Open the Settings app, tap your name, then tap iCloud. Tap iCloud Backup, then tap Back Up Now.
- Getting a new iPhone? Move your things to your new iPhone now. Apple’s Quick Start copies your apps and their data.
- Trading in your iPhone? Open the Settings app, tap General, then tap About. If Finish Repair shows next to a part, finish that repair first.
- Paired an Apple Watch? Unpair your Apple Watch.
- Open the Settings app, and tap your name. Scroll down, then tap Sign Out.
- If your iPhone asks, choose Erase this iPhone, not Sign Out But Don’t Erase.
- If your iPhone hasn’t erased yet, go back to the Settings app. Tap General, then tap Transfer or Reset iPhone. Tap Erase All Content and Settings.
- Enter your iPhone passcode if your iPhone asks.
- Using an eSIM? When your iPhone asks, choose to erase the eSIM too.
- Confirm the erase.
- On another device, take the old iPhone off your Apple Account. Open the Settings app, and tap your name. Scroll down, tap the old iPhone, then tap Remove from Account.
Erasing your iPhone turns off Find My and Activation Lock, so the iPhone is ready for its new owner. Have an AppleCare plan? You can cancel the plan or move the plan to the new owner.
What the erase deletes, and what stays
After the erase, this is what goes and what stays:
- Everything on this iPhone goes. That means your photos, contacts, music and apps, and any cards you added to Apple Pay. Apple calls the erase secure, and your iPhone goes back to factory settings.
- What’s in iCloud stays. Apple says your content isn’t deleted from iCloud when you erase your iPhone. Photos in iCloud Photos stay in iCloud, for your next iPhone. To check that your photos are in iCloud Photos, open the Settings app and tap your name, then iCloud, then Photos. If Sync this iPhone is on, your photos are in iCloud Photos.
- With iCloud Photos off, your photos go too. Your photos are then only on this iPhone, and in any backup you made. So back up first.
Not sure what your backup holds? See what’s in your iPhone backup.
Handing your iPhone to someone you know
Passing your iPhone to a child or a friend takes the same steps. Sign Out But Don’t Erase can look like the easy way, but Apple means that choice for an iPhone you keep yourself. Most data stays on the iPhone, including photos, notes and passwords. So choose Erase this iPhone. After the erase, the new owner sets up the iPhone with their own Apple Account.
Already handed your iPhone over?
You can still protect your things. Apple’s steps, in order:
- Ask the new owner to erase the iPhone, with the steps above.
- Open the Settings app on another device, and tap your name. Scroll down, tap the old iPhone, then tap Remove from Account.
- Change your Apple Account password. The new owner then can’t delete your things from iCloud. The new password doesn’t remove anything from the old iPhone.
- Used Apple Pay on the old iPhone? Apple also asks you to remove your cards and passes in Wallet.
Lost the iPhone, or was it stolen? See when your iPhone is lost or stolen.
If you use a photo vault app
A vault app keeps your photos in the app’s own storage on your iPhone, apart from the Photos app. So the erase deletes those photos too, and iCloud Photos can’t bring them back. Before you erase, make sure the photos are somewhere else:
- Moving your vault to a new iPhone? Check that your vault opens on your new iPhone. Only then, erase your old iPhone.
- Not moving your vault? Save your photos out of the vault app to the Photos app first.
If you use Underlock
We make Underlock, a private vault for photos, videos, files and notes. You open your vault by drawing a pattern on a grid of dots.
Underlock is coming soon to the App Store. Here’s how it will work.
- The erase deletes your vault from this iPhone. Erasing your iPhone deletes Underlock and every vault on this iPhone. You don’t need to delete your vault first.
- Your iPhone’s backup carries your vault. Your iPhone’s backup holds your vault’s encrypted files, and step 1 above makes that backup. On your new iPhone, restore that backup. Your 12 words then open your vault, and you choose a new pattern. Without that backup, the erase deletes your vault for good.
- Find your 12 words before you erase. Your 12 words are the recovery phrase Underlock asks you to write on paper at setup. Lost the paper? Open your vault, then tap the Settings button (a gear), then Recovery phrase, then Show recovery phrase. Draw your pattern, and write the 12 words on paper. After the erase, this iPhone can’t show your 12 words.
Questions people ask
No. Apple says your content isn’t deleted from iCloud when you erase your iPhone. Your photos stay in iCloud Photos. On your next iPhone, sign in with the same Apple Account, then turn on Sync this iPhone.
No. While you’re signed in to iCloud, any photo you delete goes from iCloud and from all your devices. Erase the whole iPhone instead, because the erase leaves iCloud alone.
Apple says that Erase All Content and Settings securely erases your personal information, your content and your settings. Your iPhone goes back to factory settings. So the next owner starts with an empty iPhone.
Sign out first, as Apple’s steps do. If Find My is on, your iPhone may ask for your Apple Account password. The erase then turns off Find My and Activation Lock, and the next owner can set up the iPhone.
Apple asks you to deregister iMessage, so that your messages reach your new phone. Underlock runs on iPhone. So before you erase, open your vault and save the photos you want to keep to the Photos app.
No. Erase All Content and Settings doesn’t ask for your Underlock pattern, and your vault goes with the erase. Forgot your pattern, and want to keep your vault? Before you erase, tap Use recovery phrase on the pattern screen. Type your 12 words, then choose a new pattern.